This post may contain affiliate links. I may receive commissions for purchases made through links in this post.
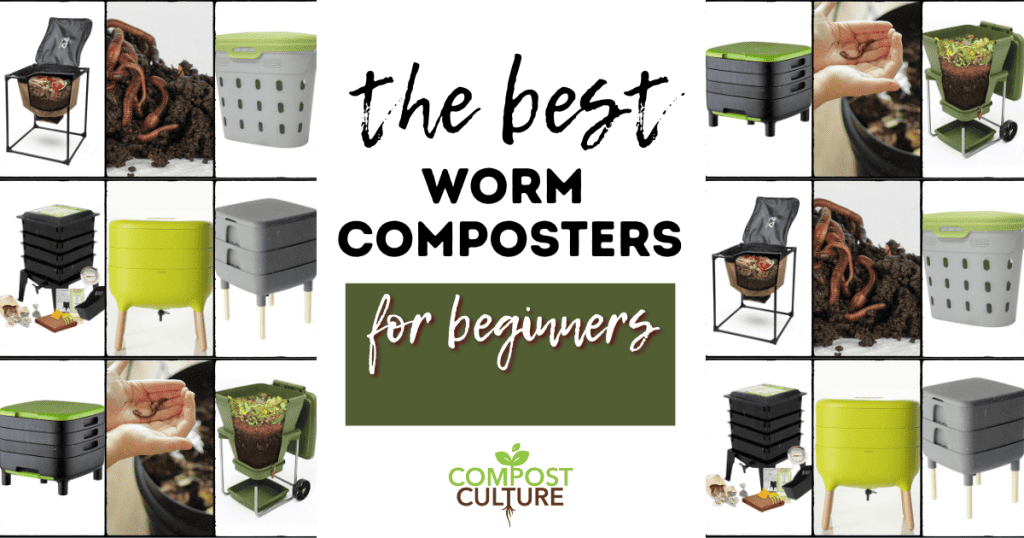
Worm composting, also known as vermicomposting, is a fun and somewhat easy way to turn kitchen scraps and organic waste into nutrient-rich compost for your garden. But it can be difficult to find the best worm composters for beginners! I’ve had my fair share of worm compost bins over the years so I know which ones are easy to use and which ones you should skip. Stick around here to explore the world of worm bins and discuss the best options available in the market. From red wigglers to worm tea, I’ll cover essential terms and provide insights into creating the ideal environment for your worm population.
Understanding Worm Bins for Beginners
A worm bin, or vermicomposting bin, is a specialized container designed to house red worms/ red wigglers and facilitate the decomposition of organic materials such as food waste and garden waste. These bins are the heart of worm composting systems, providing an efficient and compact solution for recycling kitchen waste into valuable worm castings.
Key Terms to Know:
- Red Wigglers: These are the preferred species of worms for composting due to their voracious appetite for kitchen scraps and efficient digestion process.
- Worm Composting: The process of using worms to break down organic matter into nutrient-rich compost.
- Worm Castings: Also known as worm poop, these castings are the rich, dark organic material produced by worms during the composting process.
- Worm Tea: A liquid fertilizer derived from steeping worm castings in water, providing a nutrient boost for plants.
Can you make a worm bin instead of buying one?
Absolutely! Don’t be afraid to make your own worm bin out of storage containers or 5 gallon buckets.
I have an entire tutorial on how to make your own worm bin from 5 gallon buckets! Head here to get all the details.
If you aren’t a big DIY type of person, or you want to try out one of the ready made worm farms on the market, keep reading!
Our Favorite Worm Farms on the Market
Overall Top Pick: Worm Factory 360

The Worm Factory 360 is my personal top pick. It is one of the most affordable ones on the market and is durable enough to last for years.
Pros:
Easy to move trays: Multiple trays allow for a systematic and organized composting process.
User friendly design makes it suitable for both beginners and experienced vermicomposters.
Cons:
Size: The vertical design might require more vertical space compared to other horizontal systems.
Maze Worm Farm

Pros:
Air Circulation: The maze design enhances air circulation, promoting aeration and reducing the risk of anaerobic conditions.
Moisture Control: Minimizes excess moisture, helping to maintain optimal conditions for worm activity.
Cons:
Limited Capacity: The maze design might limit the overall capacity of the system.
Urban Worm Bag

Pros:
Space Efficiency: Ideal for small spaces and indoor use, making it suitable for apartment living.
Large Surface Area: Provides a large surface area for composting worms to thrive despite its compact design.
Cons:
Durability: The bag may not be as durable as rigid containers.
Hungry Bin

Pros:
Continuous Flow: The continuous flow design ensures a steady supply of compost without disrupting the worms.
Simplicity: Known for its simplicity, making it a good choice for beginners.
Easy to Move: We love the wheels! This is great if you like to move your bin in and out of the sun, but want to avoid rain.
Cons:
Cost: Higher initial cost compared to some basic composting setups.
Size: May be bulkier compared to smaller, more compact options.
FCMP Outdoor The Essential Living Worm Composter

FCMP Outdoor The Essential Living Worm Composter
Pros:
Stylish Design: Durable enough for outdoor use, stylish enough for indoor use.
Durability: Made from durable materials for long-term use.
Price: One of the least expensive worm composters on the market.
Cons:
Worm tea spout is on the bottom of the container in a hard place to reach
Best In Ground Composter: Vego

Pros:
Natural Integration: Blends into the garden or yard seamlessly.
No Space Constraints: Since it’s in-ground, it doesn’t take up additional space.
Cons:
Limited Control: Less control over environmental factors compared to above-ground bins.
Accessibility: Harvesting may be more challenging compared to bins at waist level.
Alfresco Urbalive Home Worm Farm

Alfresco Urbalive Home Worm Farm
Pros:
Aesthetic Appeal: Designed to be visually appealing, suitable for those who prioritize aesthetics.
Outdoor Use: Intended for outdoor use, perfect for gardeners.
Cons:
Limited Capacity: The design may limit the overall capacity for composting.
Cost: The aesthetic features might come with a higher price tag.
When choosing a worm bin, consider your specific needs, available space, and the level of involvement you want in the composting process. Each bin has its strengths and weaknesses, so it’s essential to choose one that aligns with your preferences and constraints
Factors to Consider When Getting Starting with a Worm Compost System
- Bedding:
- Importance of Fresh Moist Bedding: Fresh bedding is not just a filler; it serves as the worms’ habitat and a source of carbon for the composting process. Materials like shredded newspaper, cardboard, and coconut coir provide the necessary structure, moisture retention, and a comfortable environment for worms to thrive.
- Maintaining Moisture: Bedding helps maintain the right moisture levels in the bin. Regularly adding fresh moist bedding prevents the compost from becoming too wet or compacted, ensuring an optimal environment for worm activity.
- Kitchen Scraps:
- Diverse Diet: Red worms are voracious eaters and thrive on a diverse diet of kitchen scraps. This includes fruit and vegetable peels cut into small pieces, coffee grounds, tea bags, and crushed eggshells. Avoid adding oily or acidic foods, dairy, and meat, as these can disrupt the balance and attract unwanted pests.
- Chopping and Preparing: Chopping or blending kitchen scraps into smaller pieces increases the surface area for microbial activity and makes it easier for worms to consume. Preparing the scraps in this way accelerates the decomposition process.
- Moisture Control:
- Balancing Act: Achieving the right moisture balance is crucial for a successful worm composting system. Too much moisture can lead to anaerobic conditions, unpleasant odors, and potential harm to the worms. On the other hand, insufficient moisture can slow down the composting process.
- Monitoring and Adjusting: Regularly monitor the moisture content by squeezing a handful of the composting material. It should feel like a wrung-out sponge. Adjust moisture levels by adding more bedding to absorb excess water or spraying water if the system is too dry.
- Aeration:
- Importance of Air Circulation: Adequate aeration is vital for the success of vermicomposting. It ensures the presence of oxygen, which is essential for the aerobic decomposition of organic matter and the well-being of the worms.
- Bin Designs with Aeration Features: Consider bins with features that enhance aeration, such as a well-ventilated design or a continuous flow system like the Hungry Bin. Proper aeration helps prevent the development of anaerobic conditions, which can produce harmful byproducts and negatively impact the composting process.
When setting up and maintaining a worm composting system, attention to these factors will contribute to a healthy and productive environment for your composting worms. Regular observation, adjustment, and a thoughtful approach to feeding and maintaining the bin will result in nutrient-rich compost for your plants and a thriving worm population.

What Can You Put Into a Worm Composter?
I have an in depth tutorial on worm composting for beginners. Make sure to check it out here and then come back for more details on worm composting.
What to Include in a Worm Compost System:
- Fruit and Vegetable Scraps:
- Include: Fruit and vegetable peels, cores, and leftovers are excellent additions. These materials are rich in nutrients and easy for worms to break down.
- Coffee Grounds:
- Include: Used coffee grounds provide an excellent source of nitrogen for the compost. They are acidic, but in moderation, they can be beneficial for the overall pH balance.
- Tea Bags:
- Include: Used tea bags, minus the staples, can be added. Tea leaves are a good source of organic matter and add variety to the worm diet.
- Egg shells:
- Include: Crushed eggshells are rich in calcium, which helps maintain a neutral pH in the compost. Additionally, the abrasive texture aids in the digestion process for worms.
- Shredded Newspaper and Cardboard:
- Include: These materials serve as essential bedding, providing structure, absorbing moisture, and offering carbon for the composting process.
- Leaves and Plant Trimmings:
- Include: Small amounts of leaves and plant trimmings from the garden can be added. Chop or shred them to facilitate quicker decomposition.
- Small Amounts of Paper Towels and Napkins:
- Include: Paper towels and napkins, if not heavily soiled with oils or chemicals, can be added in moderation.
What to Avoid in a Worm Compost System:
- Meat and Dairy Products:
- Avoid: Meat, fish, dairy products, and oily foods should be excluded. They can attract pests, produce unpleasant odors, and create an imbalanced compost.
- Citrus and Onions:
- Avoid: While small amounts are generally fine, excessive citrus peels and onions should be avoided as they can be too acidic for worms.
- Oily or Greasy Foods:
- Avoid: Foods high in oils and fats are challenging for worms to process and can lead to anaerobic conditions in the bin.
- Pet Waste:
- Avoid: Pet waste, including dog and cat feces, should not be added due to the risk of harmful pathogens and parasites.
- Plastics and Synthetic Materials:
- Avoid: Avoid adding plastics, synthetic materials, and non-biodegradable items. These materials do not break down and can harm the worms.
- Large or Tough Materials:
- Avoid: Large or tough materials, such as whole branches or thick stems, take longer to break down and may impede the composting process.
- Chemically Treated or Colored Paper:
- Avoid: Paper with colored ink or chemical treatments should be avoided, as these substances may be harmful to the worms.
By being mindful of what goes into the worm compost system, you can create a healthy and productive environment for your worms while producing nutrient-rich compost for your plants. Regularly monitoring and adjusting the inputs will help maintain a balanced and efficient vermicomposting process.
How to set up a new Worm Compost Bin
1. Choose the Right Bin:
Select a suitable container for your worms. Options include dedicated worm composting bins available in various designs, sizes, and materials. Ensure proper drainage and ventilation to create an optimal environment for your composting worms.
2. Create a Bedding Base:
Line the bottom of the bin with a layer of bedding material. Shredded newspaper, cardboard, or coconut coir work well. This provides a comfortable living space for the worms and serves as a source of carbon for the composting process.
3. Add Moisture to the Bedding:
Dampen the bedding with water until it reaches the consistency of a wrung-out sponge. This provides the necessary moisture for the worms to thrive. Ensure that the bedding is neither too dry nor too soggy.
4. Introduce Composting Worms:
Choose a suitable worm species for composting, such as Eisenia fetida (red wigglers) or Eisenia hortensis. Add the worms to the bin, distributing them evenly over the bedding. Start with a population that corresponds to the size of your bin.
5. Feed Your Worms:
Begin feeding your worms with kitchen scraps. Start slowly to allow the worms to adjust to their new environment. Suitable materials include fruit and vegetable peels, coffee grounds, tea bags, and crushed eggshells. Avoid acidic or oily foods, meat, and dairy initially.
6. Cover with Additional Bedding:
Once you’ve added kitchen scraps, cover them with another layer of bedding. This helps control moisture levels, prevents fruit flies, and provides insulation for the composting process.
7. Maintain the Right Conditions:
Place the bin in a location with a consistent temperature between 55-77°F (13-25°C). Ensure proper ventilation by poking a few holes in the bin lid or leaving it slightly ajar. Keep the bin out of direct sunlight to prevent overheating.
8. Monitor and Adjust:
Regularly check the moisture levels in the bin. If it feels too dry, mist with water, and if it’s too wet, add more bedding. Adjust the feeding according to the rate at which the worms process the food.
9. Harvesting the Vermicompost:
After a few months, the bedding will be transformed into nutrient-rich vermicompost. To harvest, move the finished compost to one side of the bin and add fresh bedding and food to the other. The worms will migrate towards the new food source, allowing you to easily collect the mature compost.
10. Use Your Vermicompost:
Once harvested, use the vermicompost to enrich your garden soil, potting mix, or as a top dressing for your plants. The nutrient-rich compost produced by your worms will contribute to healthier, more vibrant plant growth.
By following these steps and maintaining a balance in your worm compost bin, you’ll create a thriving environment for your composting worms and produce high-quality vermicompost for your gardening needs. Remember to be patient and observant as you establish and manage your worm composting system.
Is the finished compost of vermicompost different from regular compost?
Vermicompost, also known as worm castings or worm compost, and regular compost are both valuable soil amendments, but they differ in their composition, production processes, and some of their characteristics.
Learn how to use your worm castings here in a more detailed blog post.
Here are the key differences between vermicompost and regular compost:
- Organism Involvement:
- Vermicompost: Produced with the help of special composting worms, typically species like Eisenia fetida (red wigglers). Worms consume organic matter, breaking it down through their digestive processes, and the resulting castings become vermicompost.
- Regular Compost: Created through the action of various microorganisms, bacteria, fungi, and larger organisms like insects. The decomposition process is primarily microbial-driven, with the help of heat-loving bacteria in the initial stages.
- Production Time:
- Vermicompost: Typically has a shorter production time compared to regular compost. The presence of composting worms accelerates the breakdown of organic matter and results in finished vermicompost in a few months, under optimal conditions.
- Regular Compost: Takes a longer time to reach maturity. The microbial decomposition process generates heat, and the composting pile needs to go through different temperature phases for proper breakdown, which can take several months to a year.
- Nutrient Content:
- Vermicompost: Often considered richer in certain nutrients, particularly nitrogen, phosphorus, and potassium. The digestive processes of the worms contribute to a more concentrated and readily available form of these nutrients.
- Regular Compost: While also nutrient-rich, the nutrient content may be more balanced but less concentrated compared to vermicompost. The nutrients are usually present in a more stable, organic form.
- Microbial Diversity:
- Vermicompost: Tends to have a diverse microbial community, including beneficial bacteria and enzymes from the worms’ digestive systems.
- Regular Compost: Also supports a diverse microbial community, with different groups of microorganisms contributing to the decomposition process.
- pH Levels:
- Vermicompost: Tends to have a near-neutral pH, which is beneficial for plant growth. The digestive processes of the worms help neutralize acidity.
- Regular Compost: pH levels can vary but are generally close to neutral. The decomposition of organic matter by microorganisms can influence pH.
- Texture and Appearance:
- Vermicompost: Has a fine, crumbly texture resembling coffee grounds. It is often darker in color and may have a characteristic earthy smell.
- Regular Compost: Can have a more varied texture, ranging from fine to coarse, depending on the materials used. The color is typically dark brown, and the smell is also earthy but may vary.
While both vermicompost and regular compost are excellent soil amendments, vermicompost is produced with the specific involvement of composting worms, leading to unique characteristics such as concentrated nutrients and a shorter production time. The choice between the two depends on factors like available resources, production time preferences, and specific gardening or agricultural needs.
Worm composting is a great way to reduce kitchen waste, contribute to global warming mitigation, and produce nutrient-rich compost for your plants. By choosing the right worm bin and following best practices, you can easily integrate vermicomposting into your lifestyle, whether you have limited space or prefer outdoor composting. Get started on the right foot with the best worm composter that suits your needs and witness the power of worms in transforming organic waste into gold for your garden.
Like this post?
If so, check out some of these other popular posts on compost:
- Is an Electric Composter the Right Fit For You?
- How to Make Your Own Worm Compost Bin
- How to Compost in an Apartment without Worms
Please follow The Compost Culture on Instagram, Facebook, and Pinterest. Pin this post if you liked it!

